跨域访问和防盗链基本原理
一、什么是跨域?什么是盗链?
跨域,即前端调用的后端接口不属于同一个域(域名或端口不同),就会产生跨域问题,也就是说你的应用访问了该应用域名或端口之外的域名或端口。
盗链,即A站点在浏览器页面呈现过程拉取B站点资源(如,图片、视频等)进行展示,这就称之为“盗链”。举例说明:假设B站点作为一个商业网站,有很多自主版权的图片,自身展示用于商业目的。而A站点,希望在自己的网站上面也展示这些图片,直接使用:
<img src="http://b.com/photo.jpg"/>
这样,大量的客户端在访问A站点时,实际上消耗了B站点的流量,而A站点却从中达成商业目的。从而不劳而获。
二、针对跨域的限制
2.1 referer标签
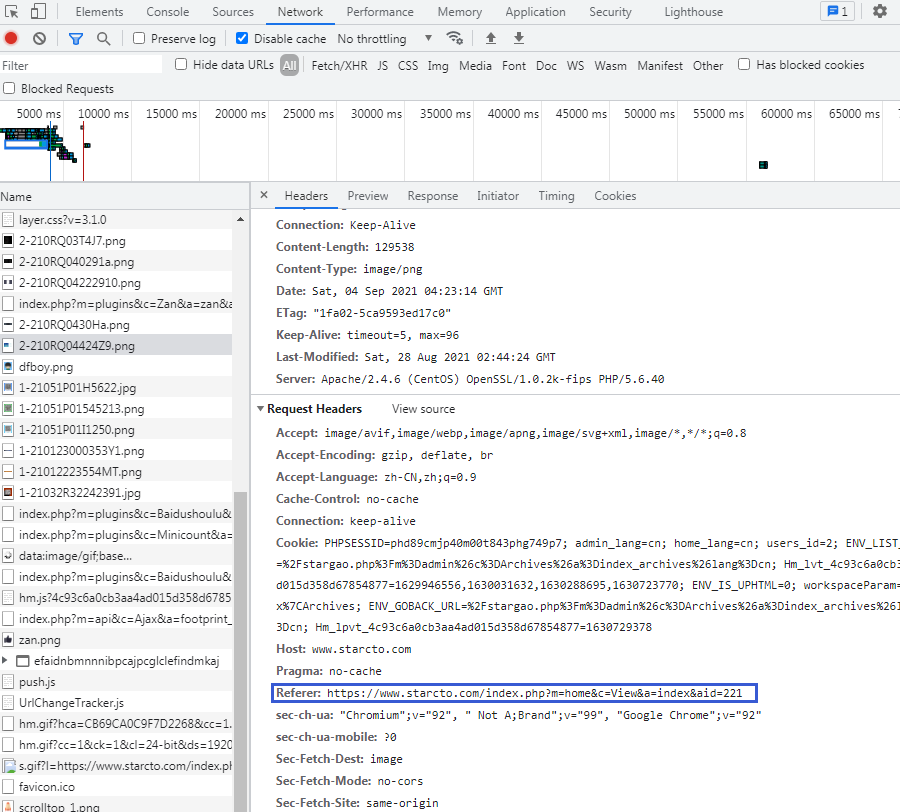
HTTP协议和标准的浏览器对于解决跨域问题提供便利,浏览器在加载非本站的资源时,会增加一个头域,头域名字固定为:
Referer
而在直接粘贴地址到浏览器地址栏访问时,请求的是本站的该url的页面,是不会有这个referer这个http头域的,即空referer。referer标签正是为了告诉请求响应者(被拉取资源的服务端),本次请求的引用页是谁,资源提供端可以分析这个引用者是否“友好”,是否允许其“引用”,对于不允许访问的引用者,可以不提供图片,这样访问者在页面上就只能看到一个图片无法加载的浏览器默认占位的警告图片,甚至服务端可以返回一个默认的提醒勿盗链的提示图片。一般的站点或者静态资源托管站点都提供防盗链的设置,也就是让服务端识别指定的Referer,在服务端接收到请求时,通过匹配referer头域与配置,对于指定放行,对于其他referer视为盗链。
2.2 浏览器如何判断一个请求是不是跨域请求?
浏览器会根据同源策略来判断一个请求是不是跨域请求。非跨域请求,在请求头中会只包含请求的主机名。
跨域请求,在请求头中会既包含要请求的主机名还包括当前的源主机名,如果这两者不一致,那就是跨域请求了。
2.3 浏览器对请求的分类
在HTTP1.1 协议中的,请求方法分为GET、POST、PUT、DELETE、HEAD、TRACE、OPTIONS、CONNECT 八种。浏览器根据这些请求方法和请求类型将请求划分为简单请求和非简单请求。
简单请求:浏览器先发送(执行)请求然后再判断是否跨域。请求方法为 GET、POST、HEAD,请求头header中无自定义的请求头信息,请求类型Content-Type 为 text/plain、multipart/form-data、application/x-www-form-urlencoded 的请求都是简单请求。
非简单请求:浏览器先发送预检命令(OPTIONS方法),检查通过后才发送真正的数据请求。请求方法为 PUT、DELETE 的 AJAX 请求、发送 JSON 格式的 AJAX 请求、带自定义头的 AJAX 请求都是非简单请求。
预检命令会发送自定义头为Access-Control-Request-Headers: content-type的请求到服务器,根据响应头的中的 “Access-Control-Allow-Headers”: “Content-Type” 判断服务器是否允许跨域访问。预检命令是可以缓存,服务器端设置 “Access-Control-Max-Age”: “3600”,这样后面发送同样的跨域请求就不需要先发送预检命令了。
三、跨域配置
测试代码可参考:https://github.com/weizhiwen/cross-domain
3.1 Nginx
[root@10-27-0-224 ~]# vim /etc/nginx/conf.d/a.com.conf
server {
    listen      80;
    server_name a.com;

    location / {
       proxy_pass http://localhost:9090/;
    }

    # 将上面的客户端请求的地址代理到 a.com 下的 /ajaxserver
    location /ajaxserver {
        # 下面是要代理的地址
       proxy_pass http://localhost:8080/test;
    }
}

[root@10-27-0-224 ~]# vim /etc/nginx/conf.d/b.com.conf
server {
    listen      80;
    server_name b.com;

    location / {
        # 代理的服务器
        proxy_pass http://localhost:8080/;

        add_header Access-Control-Allow-Methods *;
        add_header Access-Control-Max-Age 3600;
        add_header Access-Control-Allow-Credentials true;
        add_header Access-Control-Allow-Origin $http_origin always;
        add_header Access-Control-Allow-Headers $http_access_control_request_headers;

        # 如果是非简单请求的预检命令,直接在HTTP服务器返回,不再经过应用服务器
        if ($request_method = OPTIONS) {
            return 200;
        }
    }
}
3.2 Apache
# 一个节点就是一个虚拟主机,配置虚拟主机
<VirtualHost *:80>
    ServerName b.com
    ErrorLog "logs/b.com-error.log"
    CustomLog "logs/b.com-access.log" common
    # 添加代理
    ProxyPass / http://localhost:8080/

    # 把请求头的origin值返回到Access-Control-Allow-Origin字段
    Header always set Access-Control-Allow-Origin "expr=%{req:origin}"

    # 把请求头的Access-Control-Request-Headers值返回到Access-Control-Allow-Headers字段
    Header always set Access-Control-Allow-Headers "expr=%{req:Access-Control-Request-Headers}"

    Header always set Access-Control-Allow-Methods "*"
    Header always set Access-Control-Allow-Credentials "true"
    Header always set Access-Control-Max-Age "3600"

    # 处理预检命令OPTIONS,直接返回204
    RewriteEngine On
    RewriteCond %{REQUEST_METHOD} OPTIONS
    RewriteRule ^(.*)$ "/" [R=204,L]
</VirtualHost>

# 反向代理配置
<VirtualHost *:80>
   ServerName a.com
    ErrorLog "logs/a.com-error.log"
    CustomLog "logs/a.com-access.log" common

    ProxyPass /ajaxserverapache http://localhost:8080/test
    ProxyPass / http://localhost:9090/
四、盗链演示
4.1 源服务器配置www.a.com
(1)编辑测试页面
[root@10-27-0-224 ~]# cd /usr/share/nginx/html/
[root@10-27-0-224 html]# cp 404.html index.html
[root@10-27-0-224 html]# vim index.html
<html xmlns="https://starcto.com" xml:lang="en">
    <head>
        <title>源服务器</title>
        <meta http-equiv="Content-Type" content="text/html; charset=UTF-8" />
        </style>
    </head>

    <body>
        <h1><strong>我是源服务器</strong></h1>
        <img src="./CICD.png">
    </body>
</html>
(2)编辑nginx配置文件
[root@10-27-0-224 ~]# vim /etc/nginx/conf.d/www.a.com.conf
server {
        listen  80;
        server_name     www.a.com;
        root /usr/share/nginx/html/;
}
[root@10-27-0-224 ~]# systemctl restart nginx.service
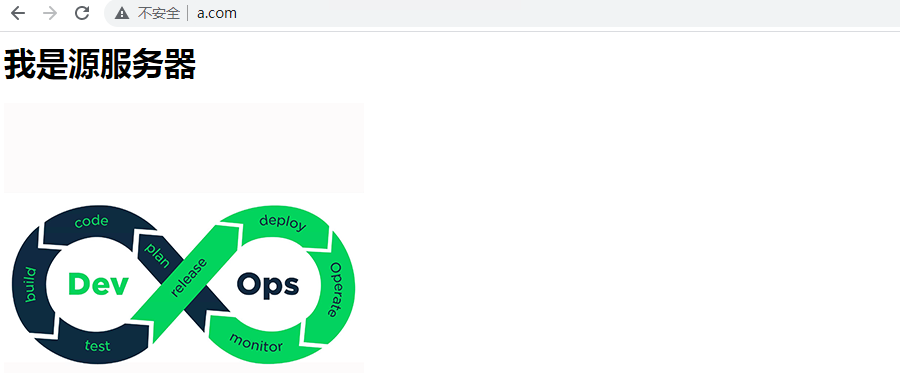
(3)访问测试页面
http://www.a.com/ # 测试记得绑定hosts
4.2 盗链服务器配置www.b.com
(1)编辑测试页面
[root@10-27-0-224 ~]# cd /usr/share/nginx/html/
[root@10-27-0-224 html]# mkdir b
[root@10-27-0-224 html]# cd b
[root@10-27-0-224 b]# vim index.html
<html xmlns="https://starcto.com" xml:lang="en">
    <head>
        <title>盗链服务器</title>
        <meta http-equiv="Content-Type" content="text/html; charset=UTF-8" />
        </style>
    </head>

    <body>
        <h1><strong>我是盗链服务器</strong></h1>
        <img src="http://www.a.com/CICD.png">      #盗链的图片
    </body>
</html>
(2)编辑nginx配置文件
[root@10-27-0-224 ~]# vim /etc/nginx/conf.d/www.b.com.conf
server {
        listen  80;
        server_name     www.b.com;
	root /usr/share/nginx/html/b;
}
[root@10-27-0-224 ~]# systemctl restart nginx.service
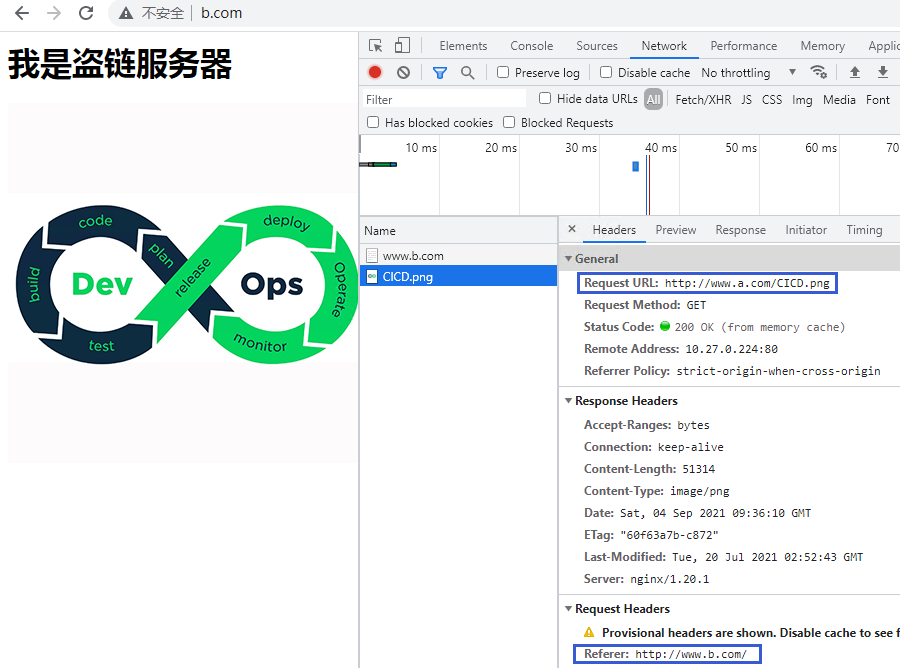
(3)访问测试页面
http://www.b.com/ # 测试记得绑定hosts
五、防盗链方法
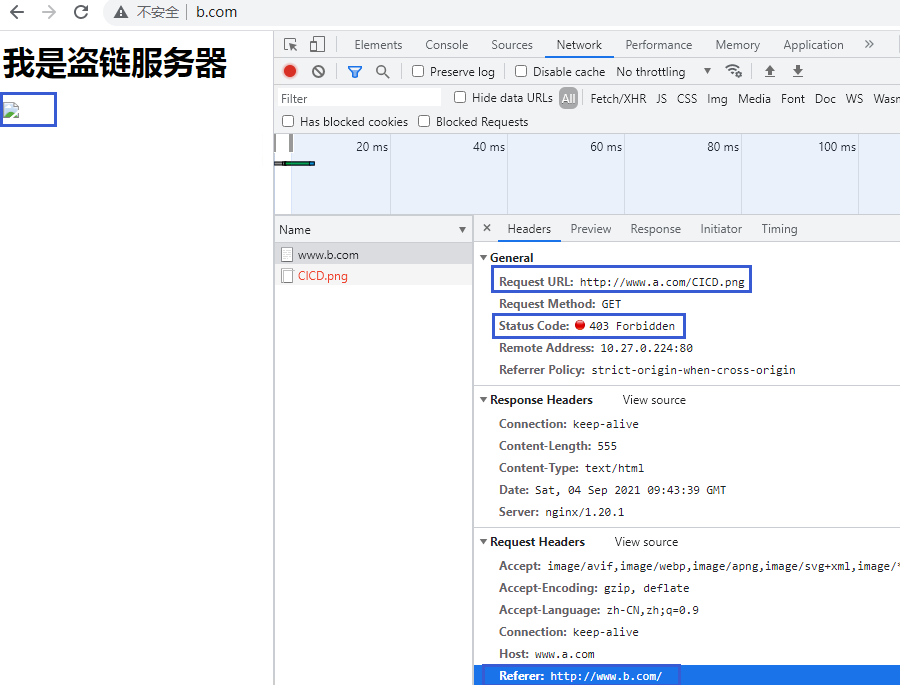
5.1 防盗链规则之返回403
(1)修改源服务器防盗链配置
[root@10-27-0-224 ~]# vim /etc/nginx/conf.d/www.a.com.conf
server {
        listen  80;
        server_name     www.a.com;
        root /usr/share/nginx/html/;
        location ~* \.(gif|jpg|png|jpeg)$ {
                root /usr/share/nginx/html;
                valid_referers none blocked www.a.com;
                if ($invalid_referer){
                        return 403;
                }
        }
}
[root@10-27-0-224 ~]# systemctl restart nginx.service
(2)访问测试页面
http://www.b.com/ # 测试记得绑定hosts
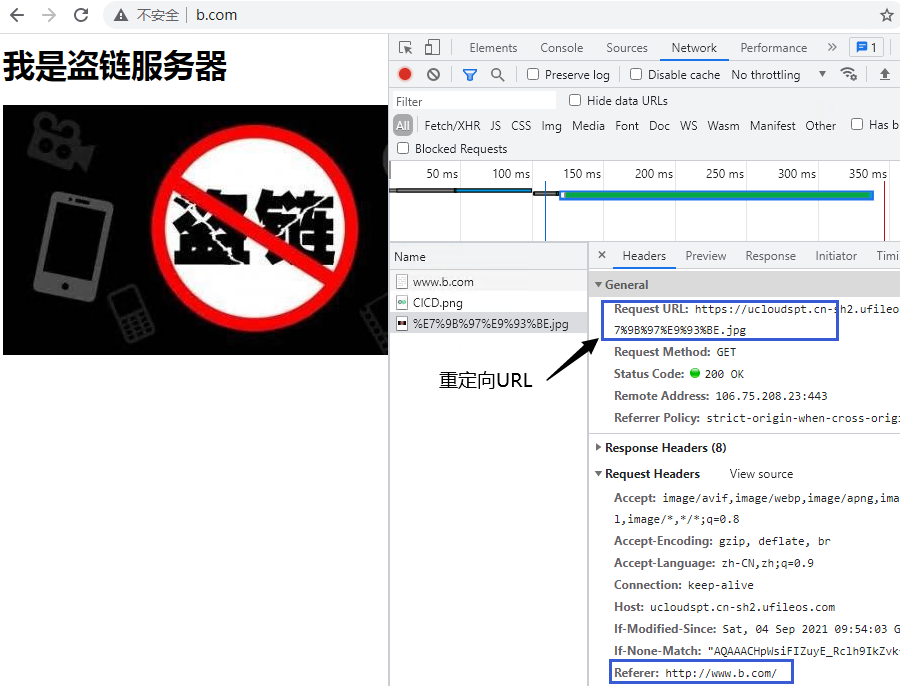
5.2 防盗链规则之重定向至其它页面
(1)修改源服务器防盗链配置
[root@10-27-0-224 ~]# vim /etc/nginx/conf.d/www.a.com.conf
server {
        listen  80;
        server_name     www.a.com;
        root /usr/share/nginx/html/;
        location ~* \.(gif|jpg|png|jpeg)$ {
                root /usr/share/nginx/html;
                valid_referers none blocked www.a.com;
                if ($invalid_referer){
                        rewrite ^/(.*)$ http://ucloudspt.cn-sh2.ufileos.com/盗链.jpg;
                }
        }
}
[root@10-27-0-224 ~]# systemctl restart nginx.service
(2)访问测试页面
http://www.b.com/ # 测试记得绑定hosts
作者:UStarGao
链接:https://www.starcto.com/service_operations/224.html
来源:STARCTO
著作权归作者所有。商业转载请联系作者获得授权,非商业转载请注明出处。
UCloud云平台推荐
随便看看
- 2021-11-26MongoDB副本集设置节点优先级priority
- 2022-01-15K8S Pod模板介绍
- 2022-07-21Ceph集群部署之ceph-deploy工具自动化安装
- 2021-03-28Hadoop伪分布式系统搭建
- 2022-05-12开源资产管理系统chemex容器化部署


